
Razor Clams – Fun for all ages!
Westport is home to numerous beaches with abundant populations of razor clams. This family-friendly harvest is a popular event on our local beaches. The Washington Department of Fish and Wildlife released dates for numerous razor clamming opportunities. So, what do you need to know to take advantage of this coastal harvest? Here is the what, where, and how to bring home your own batch of razor clams.
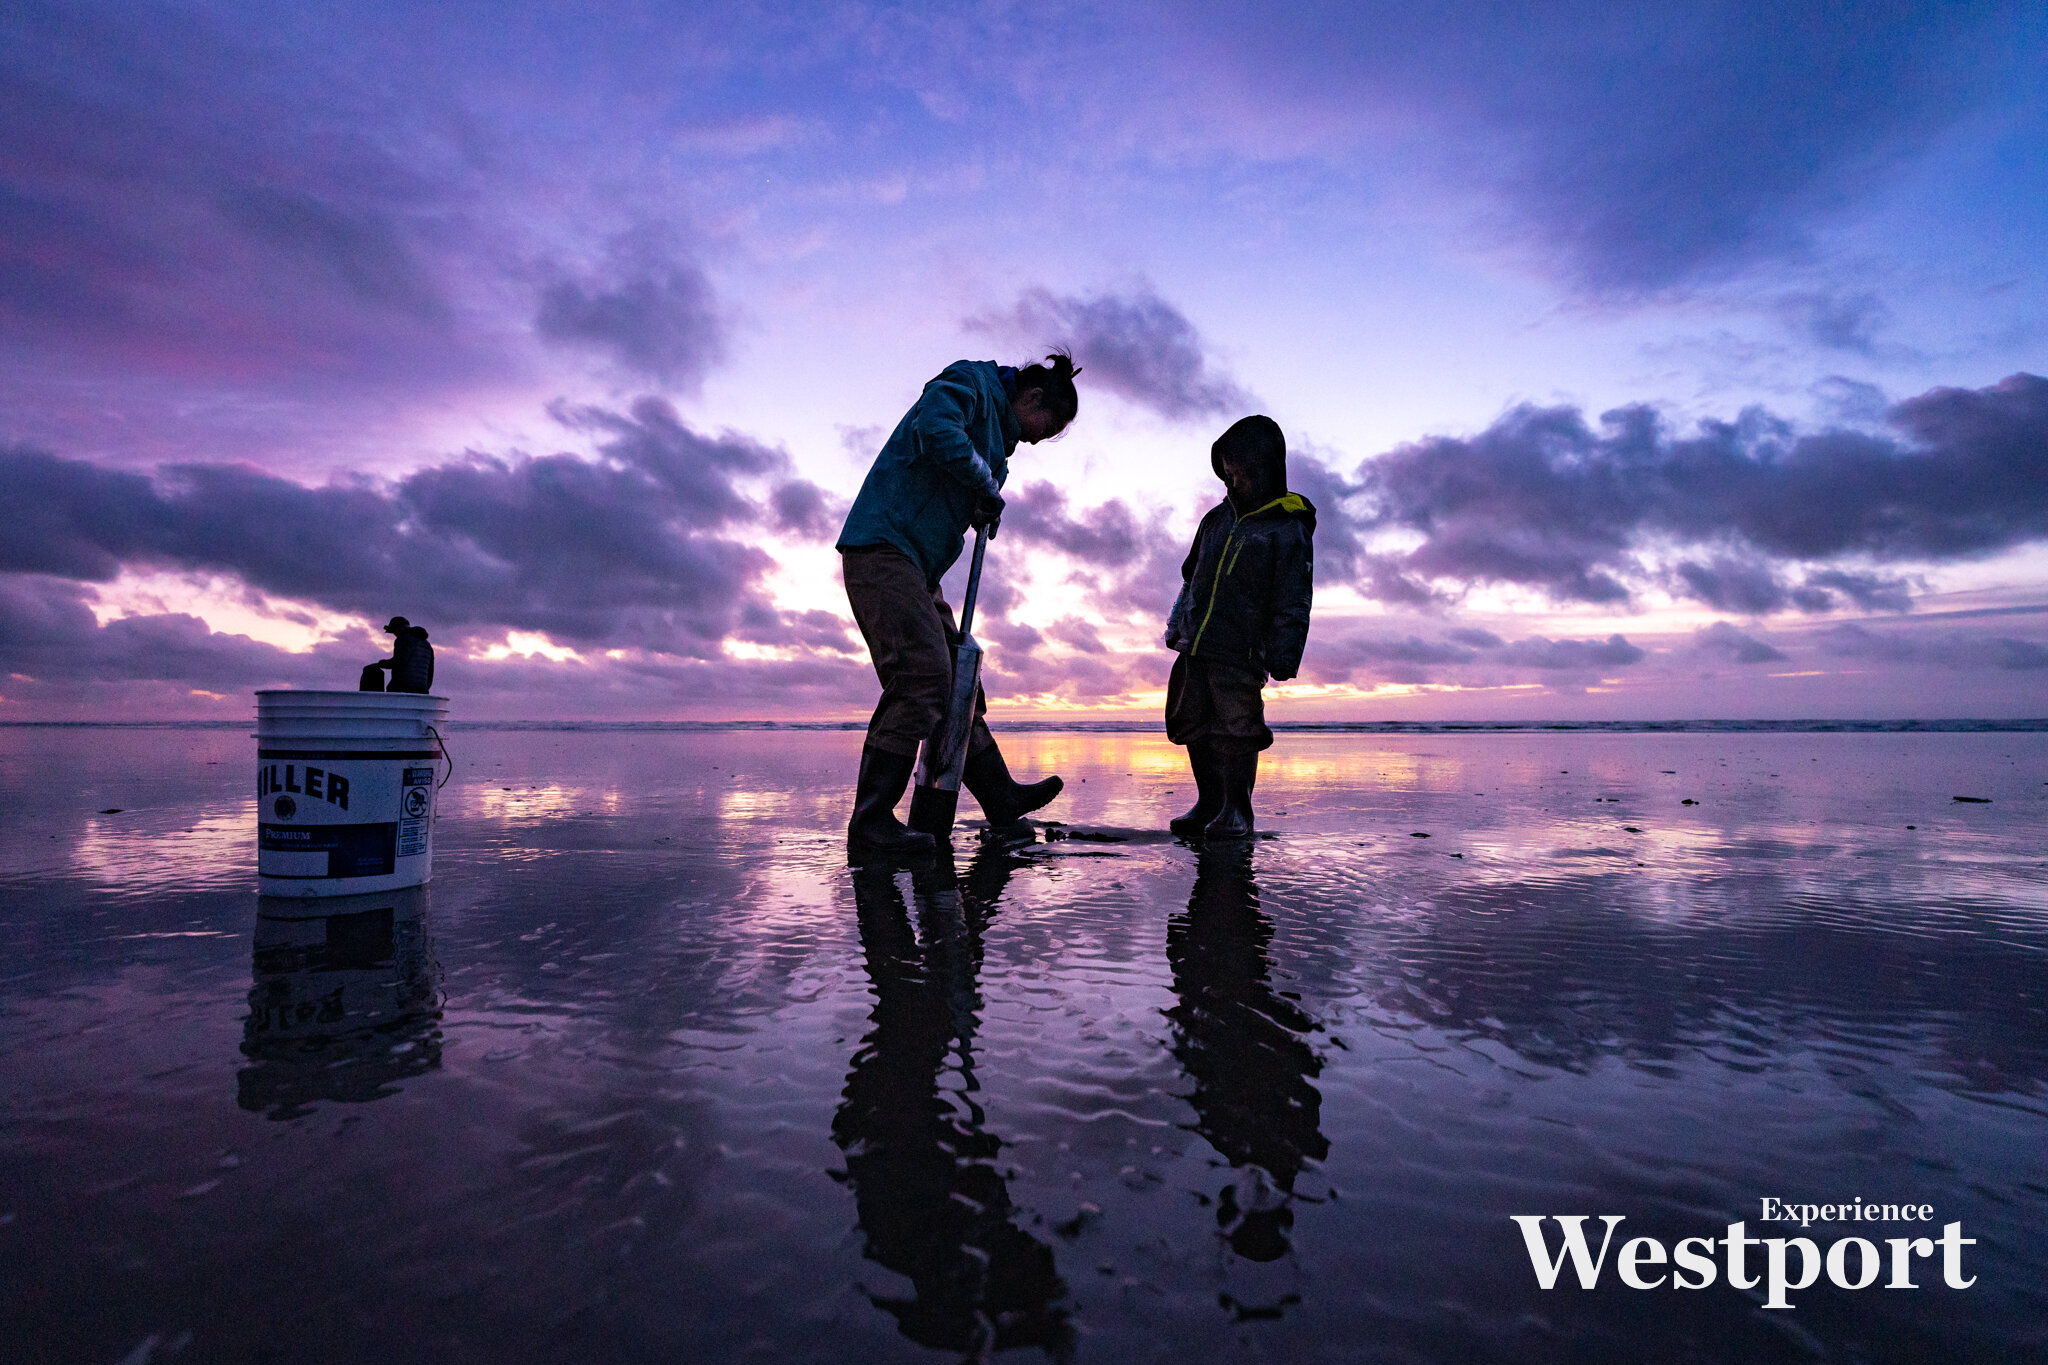
Pacific razor clams are elongated clams native to our Pacific beaches. They are meaty clams that range from 3 to 6 inches in length, rarely reaching 7 inches. Razor clams are particularly delicious and offer a wide range of uses after cleaning, including fried, baked, or added in chowders. Harvesting these tasty treats is relatively inexpensive, simple, and fun for all ages.
When ambling out to harvest clams, it is important to observe WDFW regulations. First, you must obtain a shellfishing license. These can be purchased in several ways: an annual or 1- 2- or 3-day combination license (freshwater, saltwater, and shellfishing), an annual or 3-day razor clam only license, or as an annual shellfishing license (which also makes it legal to harvest crabs!). It is important to note there are five management zones, or beaches, within Washington. When visiting Westport, the local beach (extending from the mouth of the Willapa north to the Westport jetty) is designated as the Twin Harbors management zone. Not all beaches are open on the same days, so it is essential to refer to the WDFW regulations to ensure Twin Harbors is open (https://wdfw.wa.gov/fishing/shellfishing-regulations/razor-clams#current).
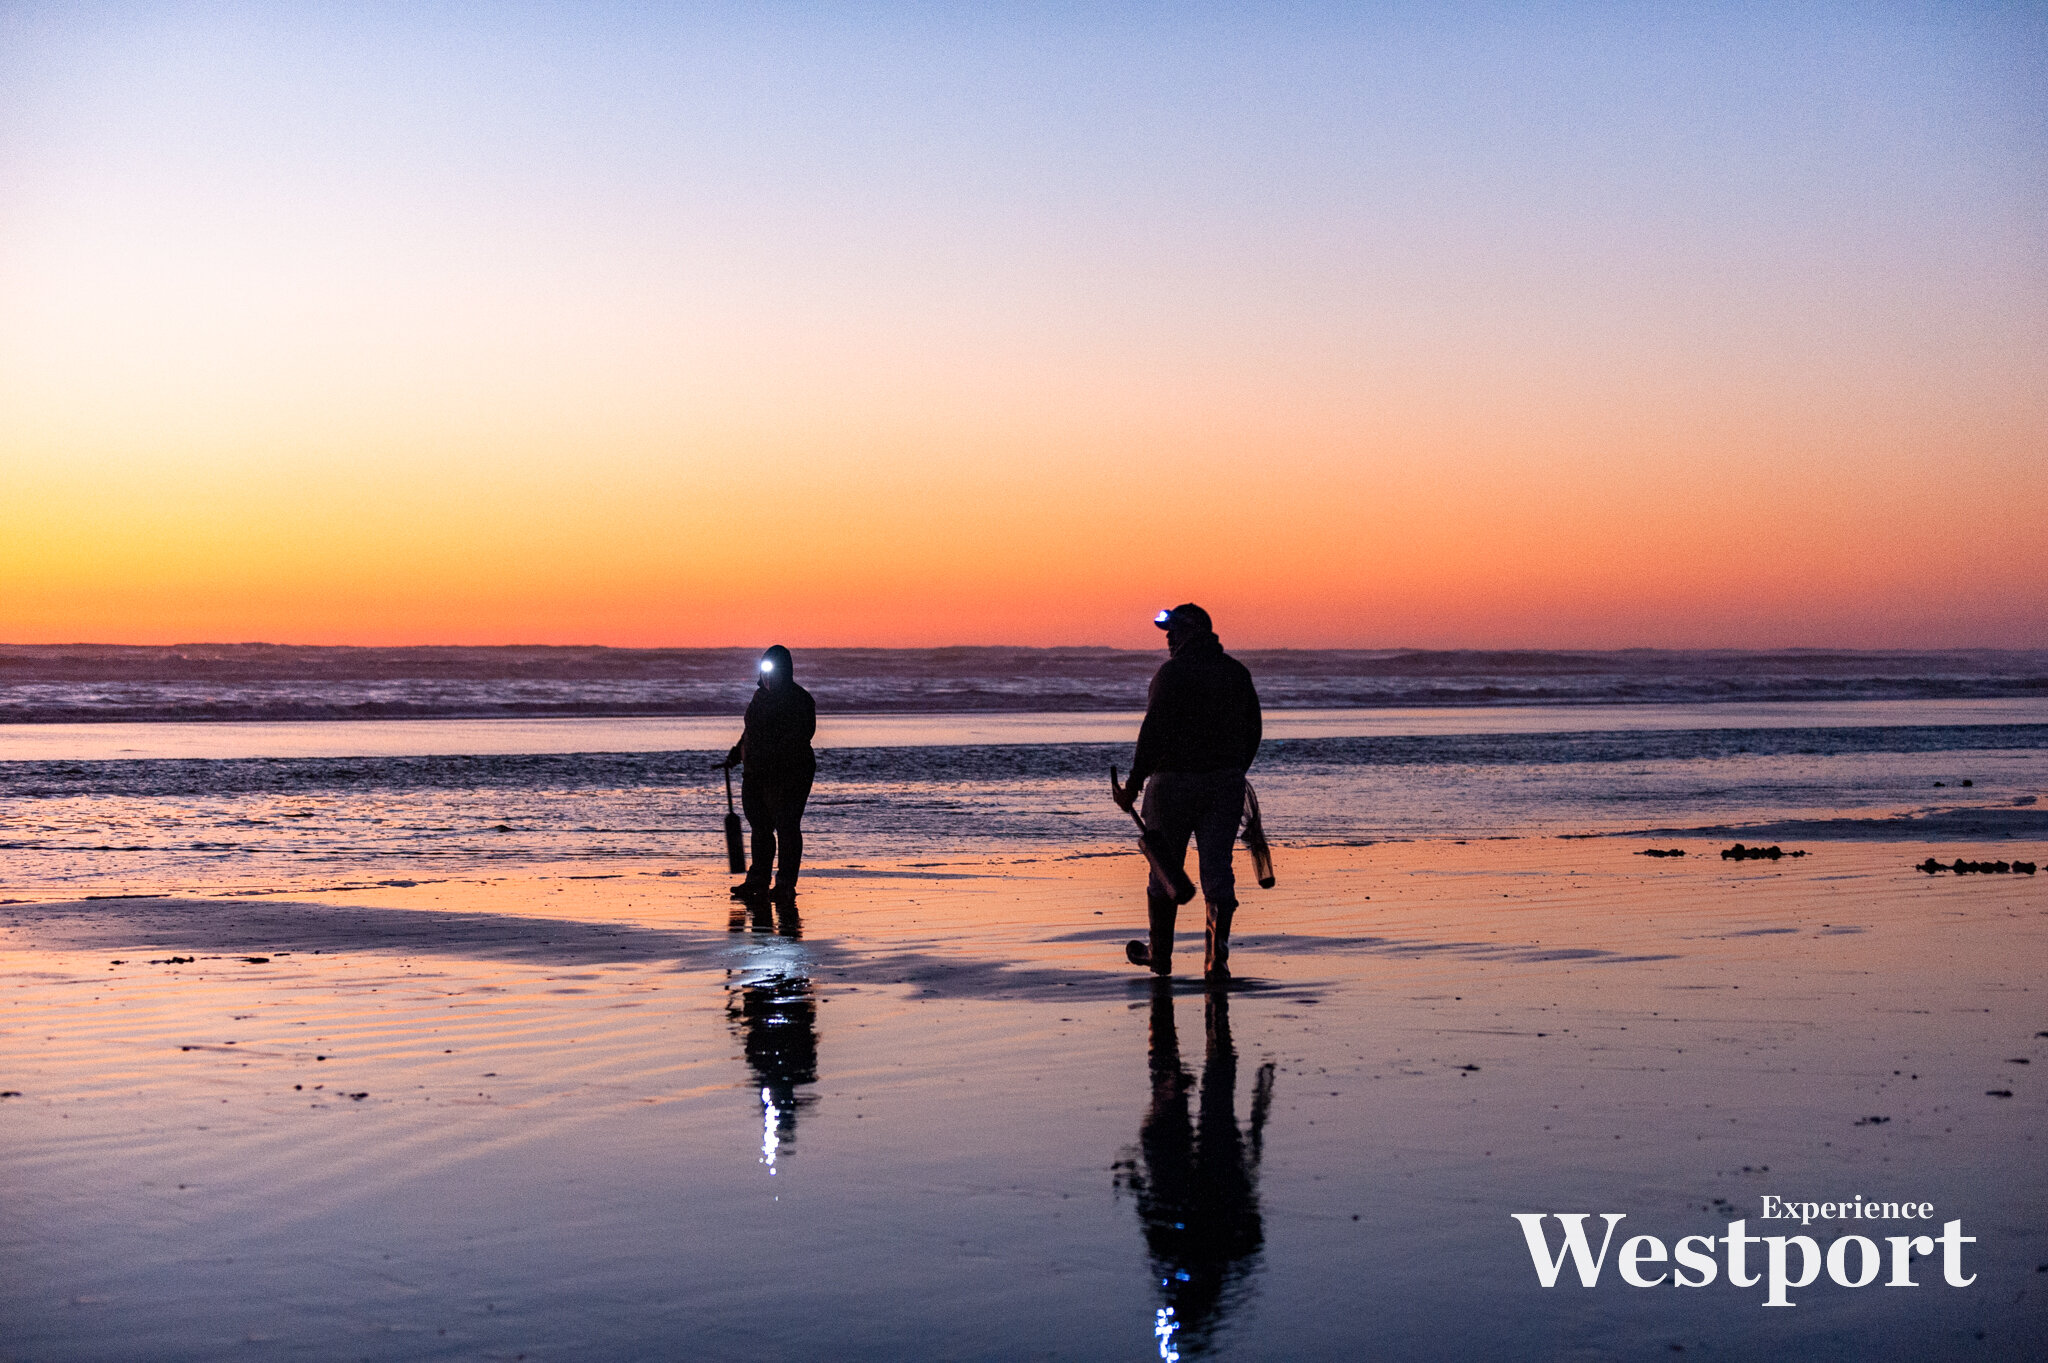
Next, it’s time to gear up! Diggers may use either a clam shovel (built with a long, narrow blade), clam gun, or for the particularly adventurous, their hands. Clam guns come in a variety of styles, from basic PVC tubes to fancy, vented aluminum plastic combinations, but they all work using suction and should be 4 inches in diameter. Appropriate outerwear is an important factor as well. Since many clam digs occur in the fall and winter, so rubber boots, a raincoat, and warm layers are key components for any clam digging outfit. For more serious diggers, hip- or chest-waders offer improved waterproofing for occasional waves washing up the beach. A headlamp or lantern is often necessary to see the clam holes during evening digs, especially as sunset sneaks up earlier in the afternoon and as the sun rises later in the early mornings.


You will need a bag or container of some sort to hold your clams while you wander the beach looking for clam signs. Something simple like a plastic grocery sack works alright until it gets full of big clams (and there’s nothing worse than your bag breaking and spilling your hard-earned clams back into the surf and sand). I recommend a heartier bag such as a potato or onion sack (the mesh netting on these allows water to escape and makes rinsing the sand off them a breeze in shallow waters on the beach). There are also commercially available clam bags that attach to belts or can be slung over a shoulder that are relatively inexpensive, easy to clean, and tough enough to withstand years of clam harvesting.
But what am I looking for?! Be sure to get to the beach a couple of hours before the low tide (which is listed on the WDFW announcements). You will begin to spot clam signs more readily as the tide goes farther out. Clam shows range from subtle dimples in the sand to obvious sand volcanos and results from their neck being near the surface of the sand. Look for dimples or holes in the sand about the size of a dime or areas with a raised ring of sand around a crater (these are clam targets!). If the sand is wet or you are clam hunting closer to the surf, stomping your feet or using the handle of a shovel or other hefty stick will cause clams to retract their necks quickly, often resulting in a small geyser of water or more noticeable indentation in the sand to indicate where they’re hiding. Center the clam hole in the sand under your clam gun opening, with the clam gun slightly towards the ocean of the show (clams are rarely directly beneath their sign but often positioned a little towards the ocean), then shimmy the tube into the sand relatively quickly. Plug and hold the small hole in the clam gun handle with a finger to create the suction and liiifftttt with your legs to pull the tube and the sand it contains out onto the beach and gently kick it loose to find your clam. If at first, you don’t succeed, dig, dig again. Clams move surprisingly quickly deep into the sand, so sometimes, it takes more than one try to extract enough sand to acquire your tasty razor clam. Razor clam shells can be sharp (hence the “razor”), so be careful when digging around, and while digging should be done quickly, you don’t want to go so fast that you crunch or cut your clam in half. You will often feel if you’ve hit your clam with a gun, so make a minor angle adjustment to redirect your tube and continue advancing it into the sand as described earlier. Shovel clamming involves more skill and takes some practice to perfect. Insert your shovel perpendicular to the clam show, about six inches away. Push the shovel forward and leverage the handle to tilt the blade, pinching the clam’s neck in the sand and moving some of the sand up and out. In one movement, slide out the shovel and replace it with your hand, then begin to carefully find the clamshell, grasp it tightly and pull it from the sand.

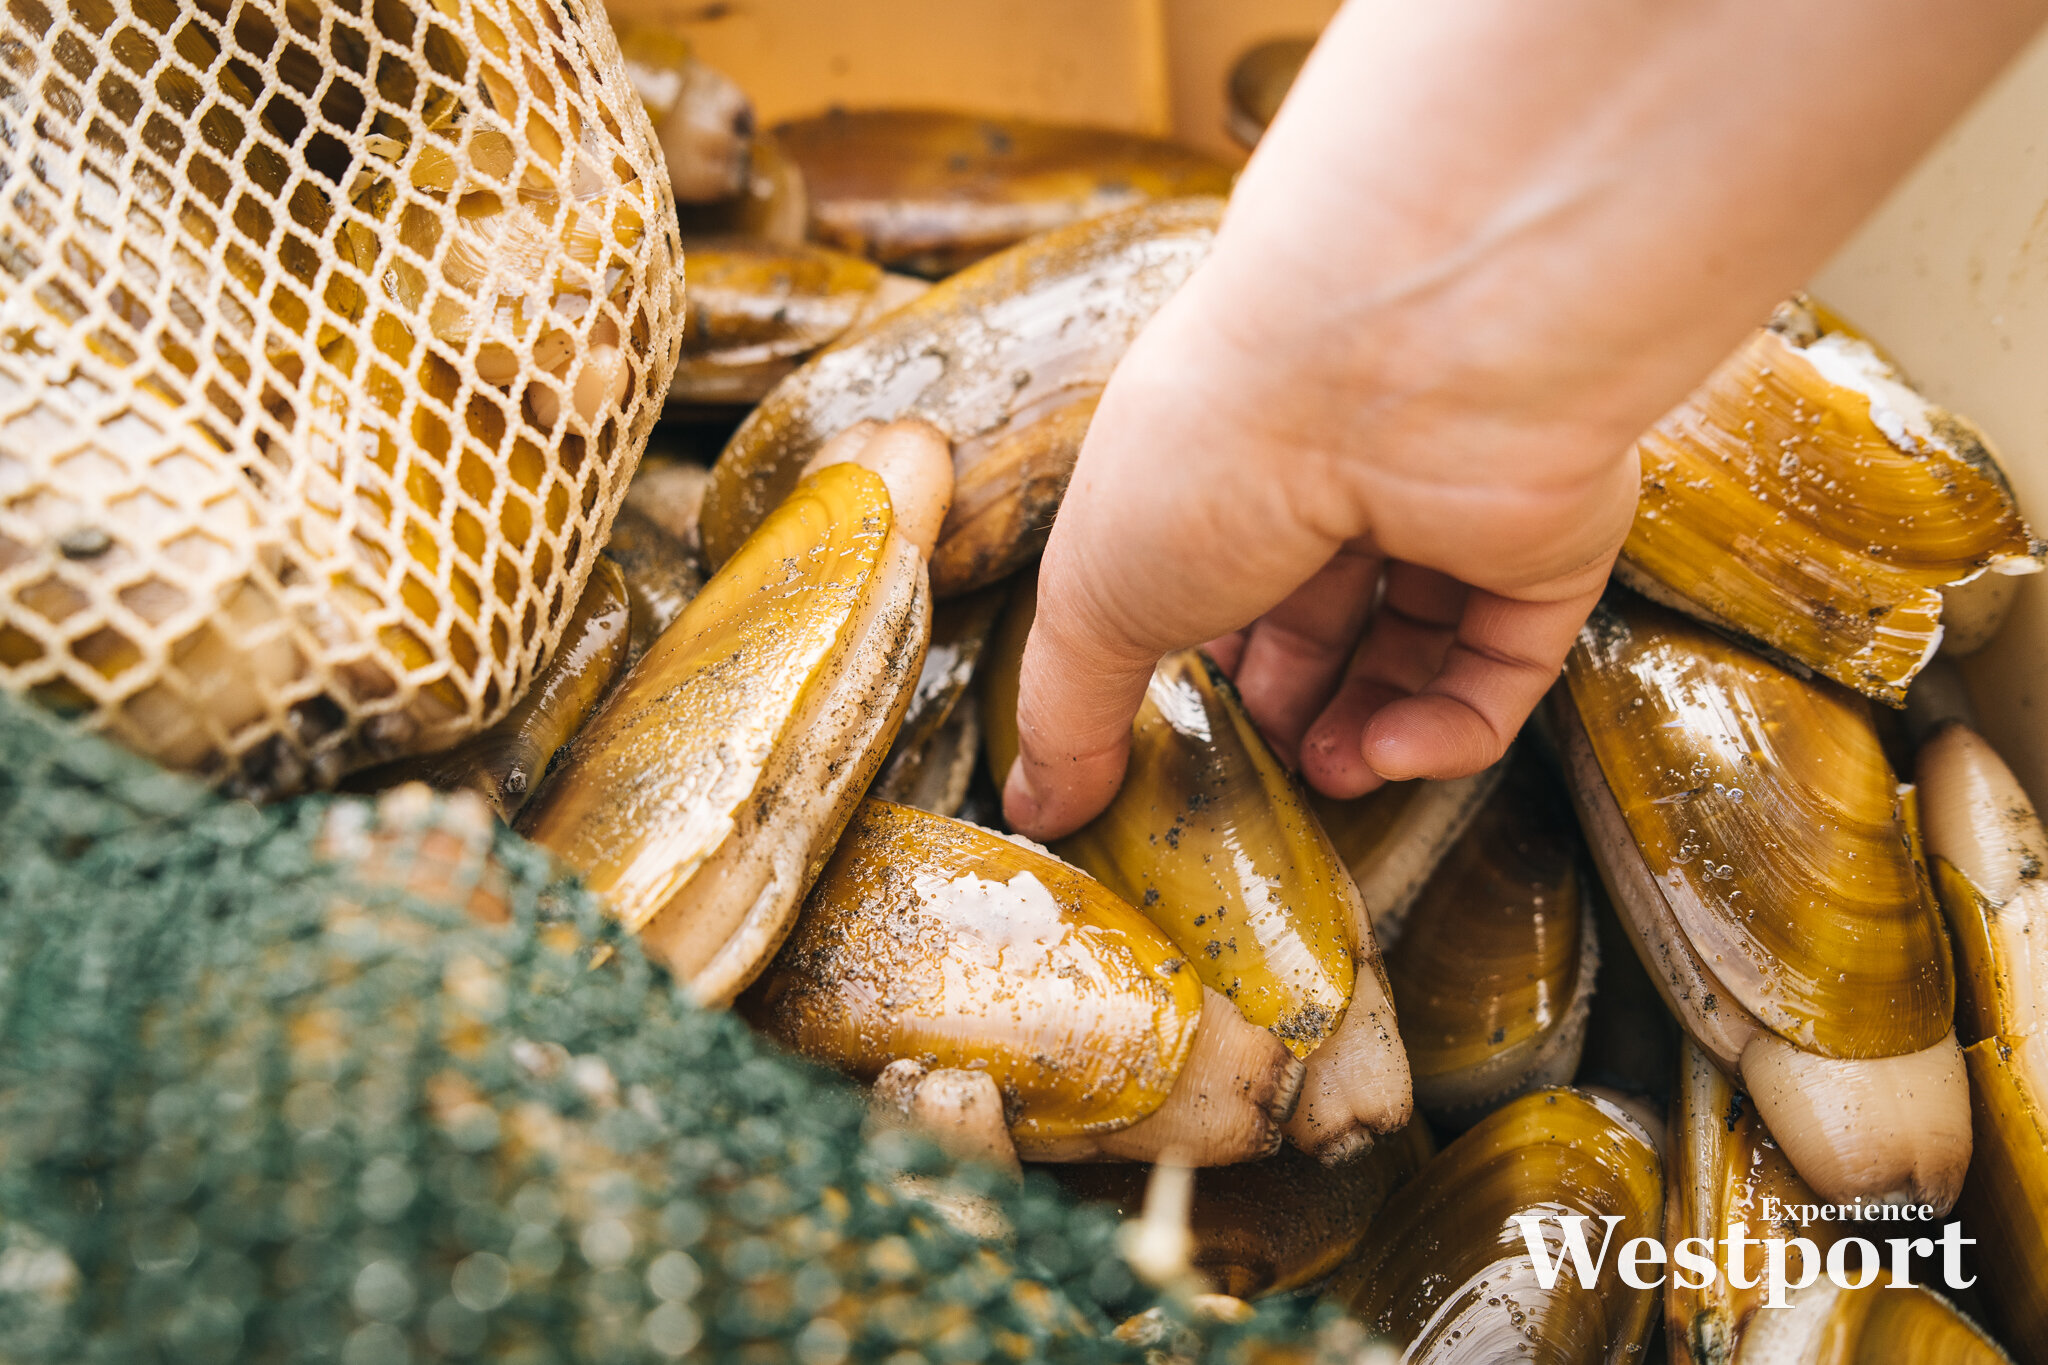
Once you’ve pulled your clam from its sandy home, place it in your bag as part of your limit. You must keep the first 15 you dig. Do not try to discard or rebury small or damaged clams. This is wasteful and illegal since their chance of survival is slim to none. When cleaning your clams, just cut off pieces that have embedded sand or damage and chop up the rest for chowder!
The cleaning process is challenging to describe in words, so I will link some videos at the end. The cleaning process is worth the effort for the clean, delicious flavor of fresh razor clam meat. These are a few things to remember so your clams don’t go to waste: Razor clams cannot survive in a bucket of water. You may place them in water to rinse for a brief period, but they should be stored out of water on ice (or in a refrigerator) with a damp towel over the top of them to maintain their moisture until they can be cleaned. According to the Washington State Department of Health, they can be stored whole in the refrigerator for up to three to four days; or once cleaned, the meat will last in the refrigerator for up to three days. Razor clams freeze very well in airtight containers or tightly sealed bags.
Sound Fishing shares the easy way to clean razor clams!
There are many ways to prepare razor clams, with the most popular ways being clam chowder, battered and fried, coated in panko and pan-fried, or in clam fritters. However, my personal favorite is my mother, Sheila’s, baked razor clam strips - tender as can be and buttery sweet. She was kind enough to provide the recipe, so I included it below. In addition, the WDFW has an excellent compilation of razor clam recipes which you can find here!
May Family Baked Clam Strips (Mom-tips are in quotes)
Ingredients (quantities are approximate):
Fresh Razor clams cut into bite-size strips, about half a limit (about 1” x 2” pieces – I usually cut diggers and necks in half, and quarter the rest of the body for average size clams)
Buttermilk, enough to soak all the clam strips
Ritz Crackers crushed into crumbs, about 1-1.5 sleeves of crackers (I’ve recently found the garlic butter ones are particularly tasty. To crush, I put them in a ziplock bag and roll them with a cup)
Old Bay seasoning, a pinch added to the crumbs (more or less to taste)
Instructions:
Preheat oven to 400°F
Place the clam strips in the buttermilk to coat them
Dredge the buttermilk coated clam strips in the Ritz crumbs until they’re well coated (“I like to pat the crumbs into the clam so the crumbs stay on better”)
Place the coated clams on a non-stick baking sheet or greased baking sheet and bake them for approximately 10 minutes at 400°F until golden brown. (“I like to flip them halfway through so the crumbs are crispy”)
Enjoy plain, or dipped in our family favorite, Marina’s tartar sauce.

About the Author:
Meet Marina May, one of Westport's most beloved deckhands, and a veterinarian technician turn fish slayer! She's a baitgirl, master filleter, fishing line management expert, and purveyor of good times!